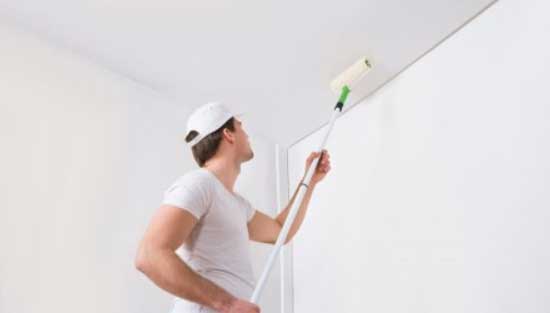
1. Avoid Unsightly Laps

Keep a wet edge if you want to make certain that when the paint dries you cannot see the overlaps where you stopped and then started again. These overlaps can be very noticeable after the paint dries, and the solution is as simple as keeping the first edge wet so the two lines of paint blend smoothly together.
Secrets to Keeping a Wet Edge
- Start painting in a corner, not in the middle of the room
- Run the roller up and down with the full height of the wall and each time you make a passing move slightly over to create the next one.
- If you see a run or a thick spot step back over and redo that swipe so you can keep things smooth and even
- Do not let your roller get almost dry before you reload it with paint. It is optimal for you to keep the roller about halfway loaded all of the time.
- Point the open side of the roller frame towards the area that has been painted. You do this because greater amounts of pressure will be on the side of the roller pointing towards the area that needs painting. This will reduce the possibility of paint ridges forming while you paint.
Where You Cannot Keep a Wet Edge Then Feather!
Sometimes when you are painting with an extension pole to get an area like a ceiling it is very difficult to maintain a wet edge. When you have this problem, you want to feather the edge of the paint out. As your roller begins to get almost dry start rolling in different directions along the dry edge to create the feathering. When you reload the roller, you begin by painting the feathered section.
2. Use a Roller To Cut in Edges and Corners
If you paint the walls in a room using a roller then use a brush to cut in the corners the area painted with a brush is going to have a different texture than the area painted with the roller.
Instead of letting this happen invest in a smaller roller, a 4” will likely do the trick, and use that to paint around edges and in the corners of the room. You will like the uniform look it will create when the paint has dried.
3. Mix That Paint
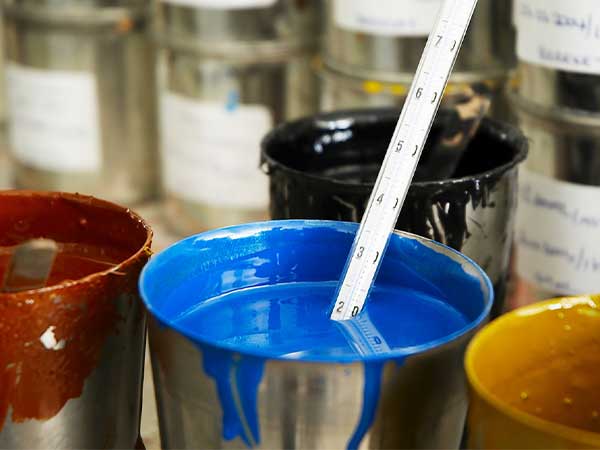
One of the biggest painting mistakes that DIY folks make is to buy two or more gallons of paint and use them from the one-gallon cans. You may go to the store and buy several gallons of paint in one-gallon containers, and have them all mixed at the same time, but the result is not going to always be a perfect color match.
Each gallon of paint is going to have a slight variation in the hue of the paint. When you look at it in the can this may not seem obvious, then when you see the finished room, you will see the different shades of color.
This problem is easy to avoid by getting a five-gallon empty plastic bucket and mixing all of your one-gallon cans before you even begin to paint. You get a smooth and uniform color. You can get a bucket with a lid in case you need to store some paint and return to painting the next day, or you can pour the paint back into the original containers for storage.
4. Painting The Trim
The trim in the room gives the area a finished look. You want your trim to look evenly painted, smooth, and flawless. You can get these results by removing the trim from the wall and painting it on sawhorses, or you can paint the trim before you paint anything else.
If you paint the trim first you can cover it with painter’s tape so the paint from the walls or ceiling will not transfer to it.
When painting trims, you should put a layer of paint on it and let it dry completely. Then lightly sand the newly painted surface and use a dry cloth to wipe over it and remove all dust particles. Then apply a second coat of paint over the sanded wood.
The result will be flawless trim that looks smooth and appears to have no imperfections.
5. Let The Paint Dry Completely Before Removing The Painter’s Tape

Resist the urge to rip the tape off the trim the minute that the last roller of paint has been applied to the wall. Let that paint cure for at least 24 hours. Then take a box cutter knife or some other very sharp knife and score the tape along the edge.
When you cut through the film created by the paint you will be able to tear the tape off without tearing up sections of paint.
Be sure you pull the tape off with it angled at 45 degrees and you will be less likely to remove any paint with the tape.
If you remove the tape while the paint is still wet you get smears and the tape is gummy so you transfer paint to your hands, clothes, and other sections of the room.
Final Thoughts
To create a painted area that looks professional all you have to do is use quality paint products and take your time. If you rush to try and get through the finish will show that you tried to hurry.